Understanding Laravel seeders and model factories using an e-commerce MVP use case
Imagine this scenario, You’re building a small e-commerce store that allows users to browse and purchase products from a website or app. For development purposes, or to showcase a demo to your client, or to write tests, or helping new team members get started in your project, you need to simulate how each page and its sub sections would appear on the website or app with tons of data such as 1000s of products and product images, 100s of user orders, user order items, numerous notifications for each user and ensure that everything functions together properly.
Some of you might be doing this by importing a functional database dump directly or by seeding it using procedural methods like DB::insert() in a seeder class. Both of these approaches are somewhat time consuming, are prone to a lot of errors and are hard to maintain. This is where seeding with Laravel model factories comes in handy. They automate all this dummy data generation process in an eloquent way, saving time and ensuring consistent data.
In this article, we'll cover everything you need to know about model factories, from fundamentals to some of the more advanced techniques. You’ll be amazed at how much it’ll help your workflow.
Prerequisites
Please ensure that you have the latest version of Laravel installed. At the time of writing this, we are using Laravel Framework version 10.33.0. You’ll also need a basic understanding about Laravel, Eloquent ORM, and Eloquent relationships. All of the code is available for reference on my Github repo.
Let’s get started,
The default Laravel installation includes a a User model, its migration and its model factory.
You can find the User model’s UserFactory at:
/database/factories/UserFactory.php
class UserFactory extends Factory
{
	public function definition(): array
	{
		return [
			'name' => fake()->name(),
			'email' => fake()->unique()->safeEmail(),
			'email_verified_at' => now(),
			'password' => '$2y$10$92IXUNpkjO0rOQ5byMi'
			'remember_token' => Str::random(10),
		];
	}
	//....
}
Here, Laravel is using the Faker library here to generate fake data. It has a lot of of fake data methods that is available to you. It can generate fake names, phone numbers, emails, job titles, addresses, credit card numbers etc. Head over to Faker’s docs to see the various formatters that are available: https://fakerphp.github.io/formatters/
Now, let's move on to seeding our User model factory. To do this, open your terminal inside the project root. Then, run the following command:
php artisan tinker
Inside the tinker, execute the following code:
\App\Models\User::factory(10)->create();
Under the hood the \App\Models\User model uses the HasFactory trait, which gives it the ability to call factory() method to create mock instances.

You should now see that the 10 users have been created in our users table.
However, there is a better way to execute the model factories using Laravel's seeder classes and artisan commands. This approach is a lot quicker and it allows us to organize our factory classes and models in one location. Here’s how you can do it:
Open database/seeders/DatabaseSeeder.php and uncomment the code inside the run() It would look like this:
<?php

namespace Database\Seeders;

// use Illuminate\Database\Console\Seeds\WithoutModelEvents;
use Illuminate\Database\Seeder;

class DatabaseSeeder extends Seeder
{
    /**
     * Seed the application's database.
     */
    public function run(): void
    {
        \App\Models\User::factory(10)->create();

        \App\Models\User::factory()->create([
            'name' => 'Test User',
            'email' => 'test@example.com',
        ]);
    }
}
In the terminal, run php artisan db:seed and you will be able to see the created users in the users table. The DatabaseSeeder’s run() method is is automatically invoked when you executed that command. There was no need to access the artisan tinker solely to seed our User model factories. We will be exploring more about these seeder classes later in this tutorial.
Exploring further
Now, let’s take the things a step further and consider our e-commerce store that allows users to browse and purchase products.
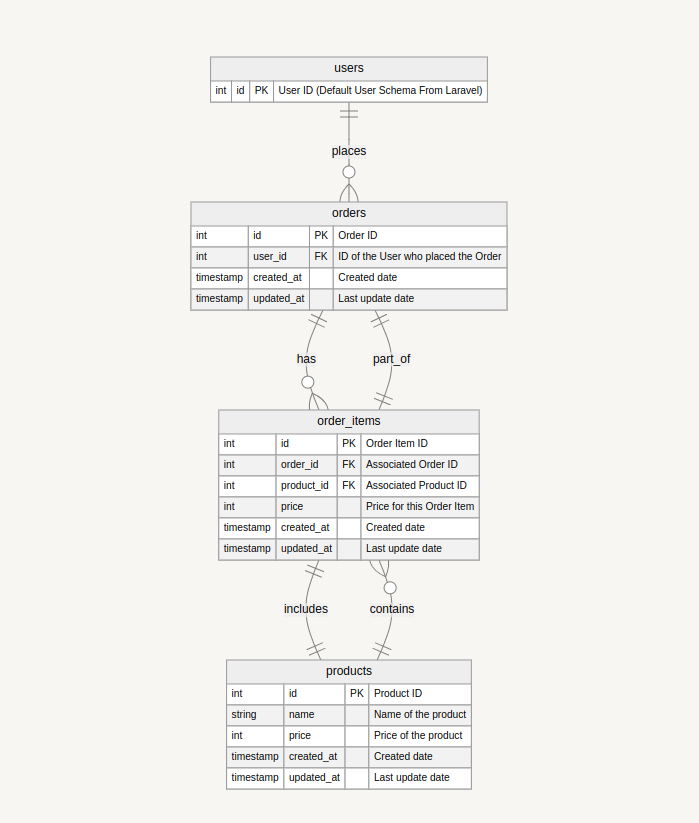
Here is what the ER Diagram of our e-commerce store database may look like:
Next, let’s create the Product, Order and OrderItem models, and it’s related migrations and factories.
First the Product model, in the terminal run this command:
php artisan make:model Product -mfs
Here in this -mfs flag, m stands for migration, and f for the factory and s for the seeder.
If you are curious, execute
php artisan make:model --helpand you will see all the commands that are available formake:modeloption
And next Order model
php artisan make:model Order -mfs
And finally the OrderItem model
php artisan make:model OrderItem -mfs
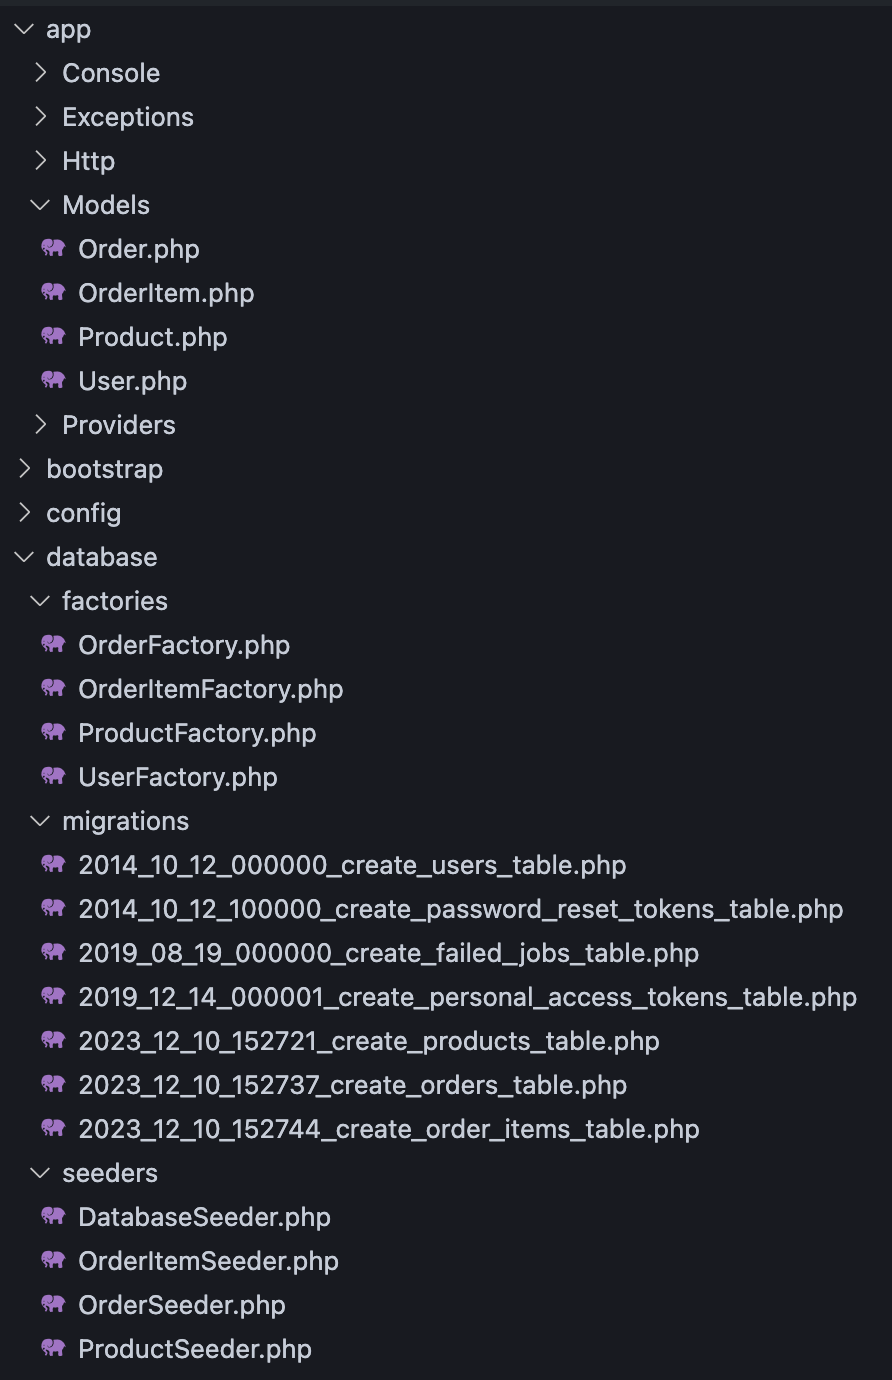
Now, your project folder with the new changes would look like this:
Let’s add the table schema for each of the models we’ve created. Update the up methods in their respective migration files with the following codes:
Product
migration file: create_products_table.php
public function up(): void
{
	Schema::create('products', function (Blueprint $table) {
      $table->id();
      $table->string('name');
      $table->integer('price');
      $table->integer('stock');
      $table->timestamps();
  });
}
OrderItem
migration file: create_order_items_table.php
    public function up(): void
    {
        Schema::create('order_items', function (Blueprint $table) {
            $table->id();
            $table->foreignId('order_id')->constrained();
            $table->foreignId('product_id')->constrained();
            $table->integer('quantity');
            $table->integer('price');
            $table->timestamps();
        });
    }
Order
migration file : create_orders_table.php
public function up(): void
{
	Schema::create('orders', function (Blueprint $table) {
		$table->id();
		$table->foreignId('user_id')->constrained();
		$table->timestamps();
	});
}
With all the updated migrations in place, let’s migrate.
php artisan migrate
That would complete the DB schema required for our app.
Finally, let's add some Products using our Model Factories. Go to the ProductFactory class, which we created earlier, and update it with this code:
<?php

namespace Database\Factories;

use Illuminate\Database\Eloquent\Factories\Factory;

class ProductFactory extends Factory
{
    /**
     * Define the model's default state.
     *
     * @return array<string, mixed>
     */
    public function definition(): array
    {
        return [
            'name' => fake()->words(2,true),
            'price' => fake()->numberBetween(100,10000),
        ];
    }
}
The definition() method defines the default state of your model. Whenever we need to create a new instance of the Product model, factory will use the values defined in the definition() method as the default. Over there we're assigning random default values to the Product’s attributes, name and price.
Let's break down the attributes and the faker methods in our definition():
-
'name' ⇒ fake()->words(2,true): generates a random product name/title with two words. -
‘price’ ⇒ fake()->numberBetween(100,10000): For the product’s price we’re going to randomly generate a number between 100 and 10,000
Next, to insert these Product factory data to the products table we have to run the seeder which we just have created. There are few ways to do that, let’s take the easiest approach! Run this artisan command :
php artisan db:seed ProductSeeder
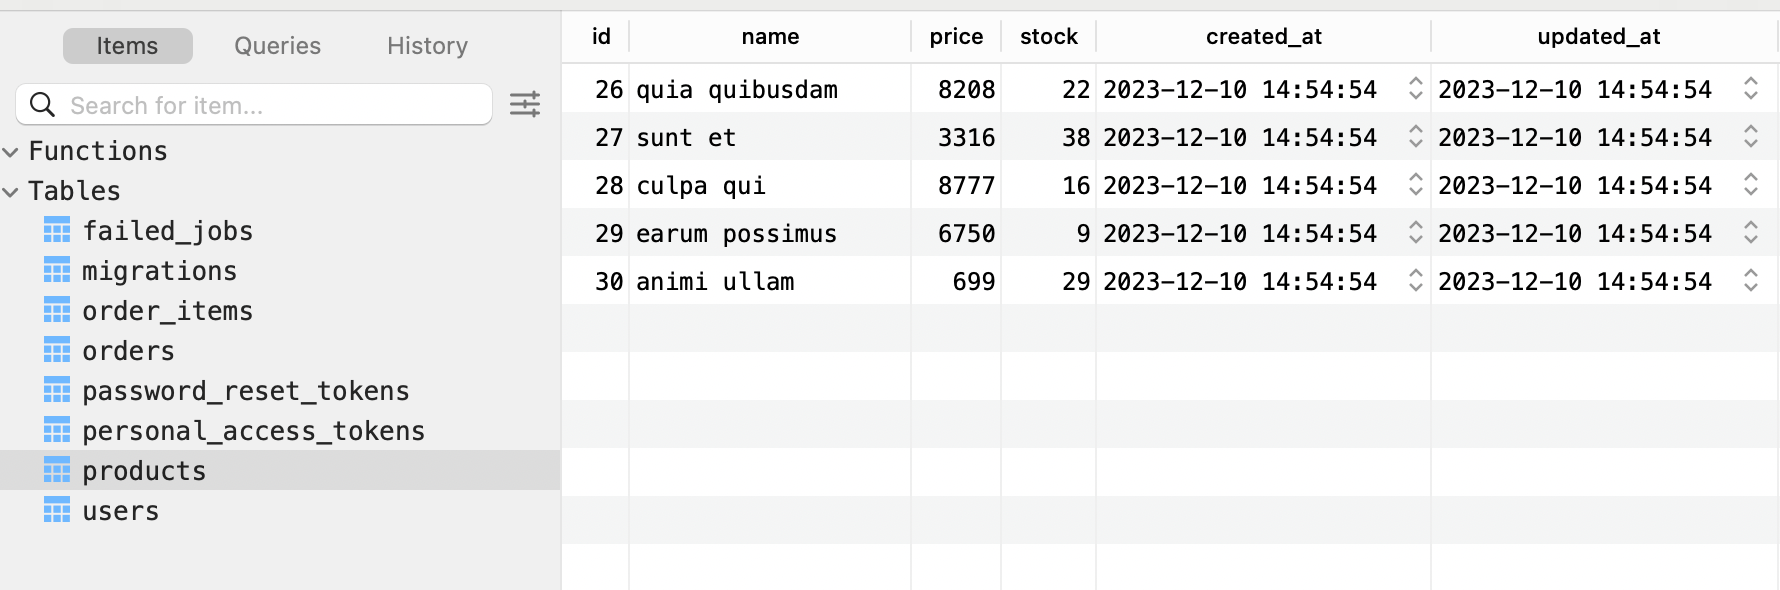
We will now have 5 products in or Products table. That was super easy right? 🙂
Now, comes the fun part where we can really get our hands into the magic of Laravel’s developer experience! lets create some fake orders with fake products for our users. For that, we need to have relationships between User, Order, Product and OrderItem model.
Adding Eloquent Relationships
As you can see from the ER diagram a User can have many Order (one-to-many). Let’s add the orders() method for this to the User model
\App\Models\User.php
function orders(): HasMany
{
	return $this->hasMany(Order::class);
}
An Order can have multiple OrderItem (one-to-many) and it always belongs to a single User (one-to-one). We will relate this using items() and user()
\App\Models\Order.php
function items(): HasMany
{
   return $this->hasMany(OrderItem::class);
}

function user(): BelongsTo
{
	return $this->belongsTo(User::class);
}
Each OrderItem belongs to a specific Order (one-to-one) and is also associated with a particular Product (one-to-one). We will set this up using order() and product() method respectively.
\App\Models\OrderItem.php
function order(): BelongsTo
{
	return $this->belongsTo(Order::class);
}

function product(): BelongsTo
{
	return $this->belongsTo(Product::class);
}
That's it for our models and relationship setup! Now let’s try and use these to seed our ecommerce app.
Seeding Orders
Note that, we already have the seeders for users and products. What we need now is the functionality to create orders for each user and add one or multiple product (order item) to each of these orders.
For this, open up the OrderFactory.php and update the definition() with the following code:
public function definition(): array
{
	return [
		'user_id' => User::inRandomOrder()->first()->id,
	];
}
All we are doing here is associating a random User to an Order using the user_id attribute.
Next, update the database/seeders/DatabaseSeeder.php run() method with following code:
public function run(): void
{
	User::factory(10)->create();
	Order::factory(10)->create();
}
Run php artisan migrate:fresh to start fresh!
Run php artisan db:seed to seed the DatabaseSeeder
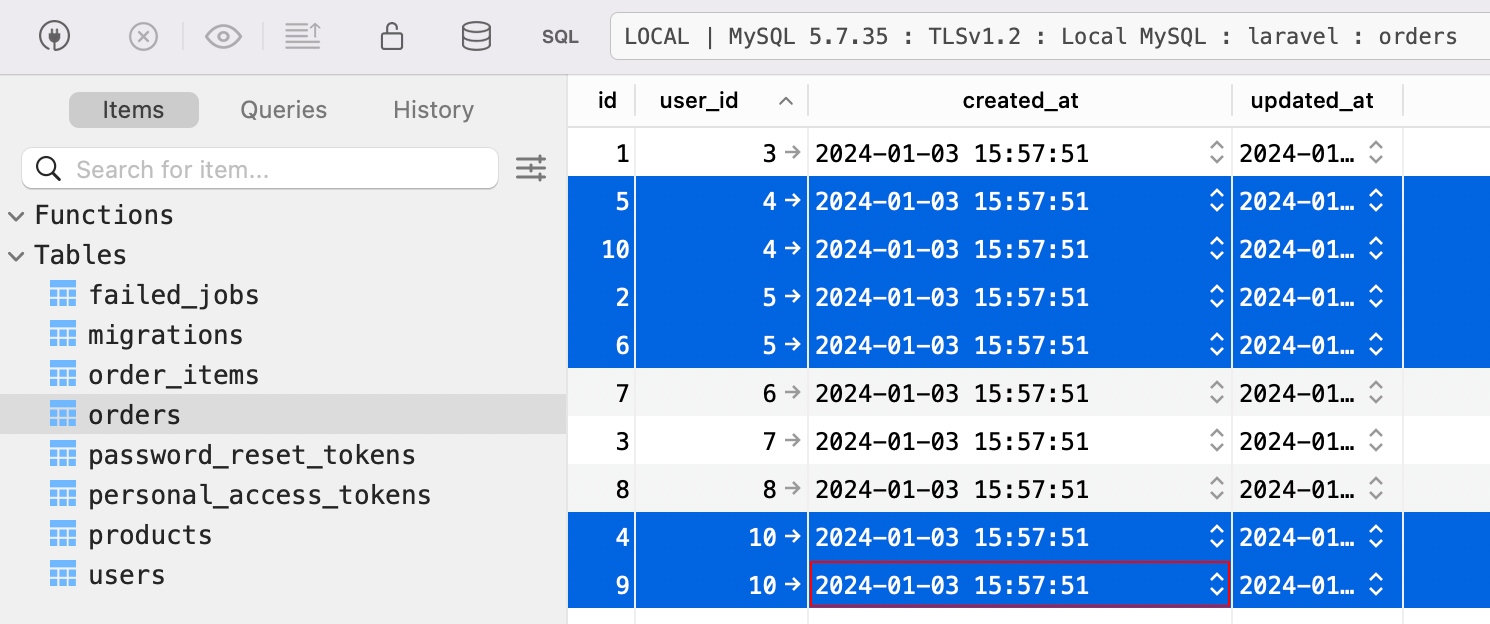
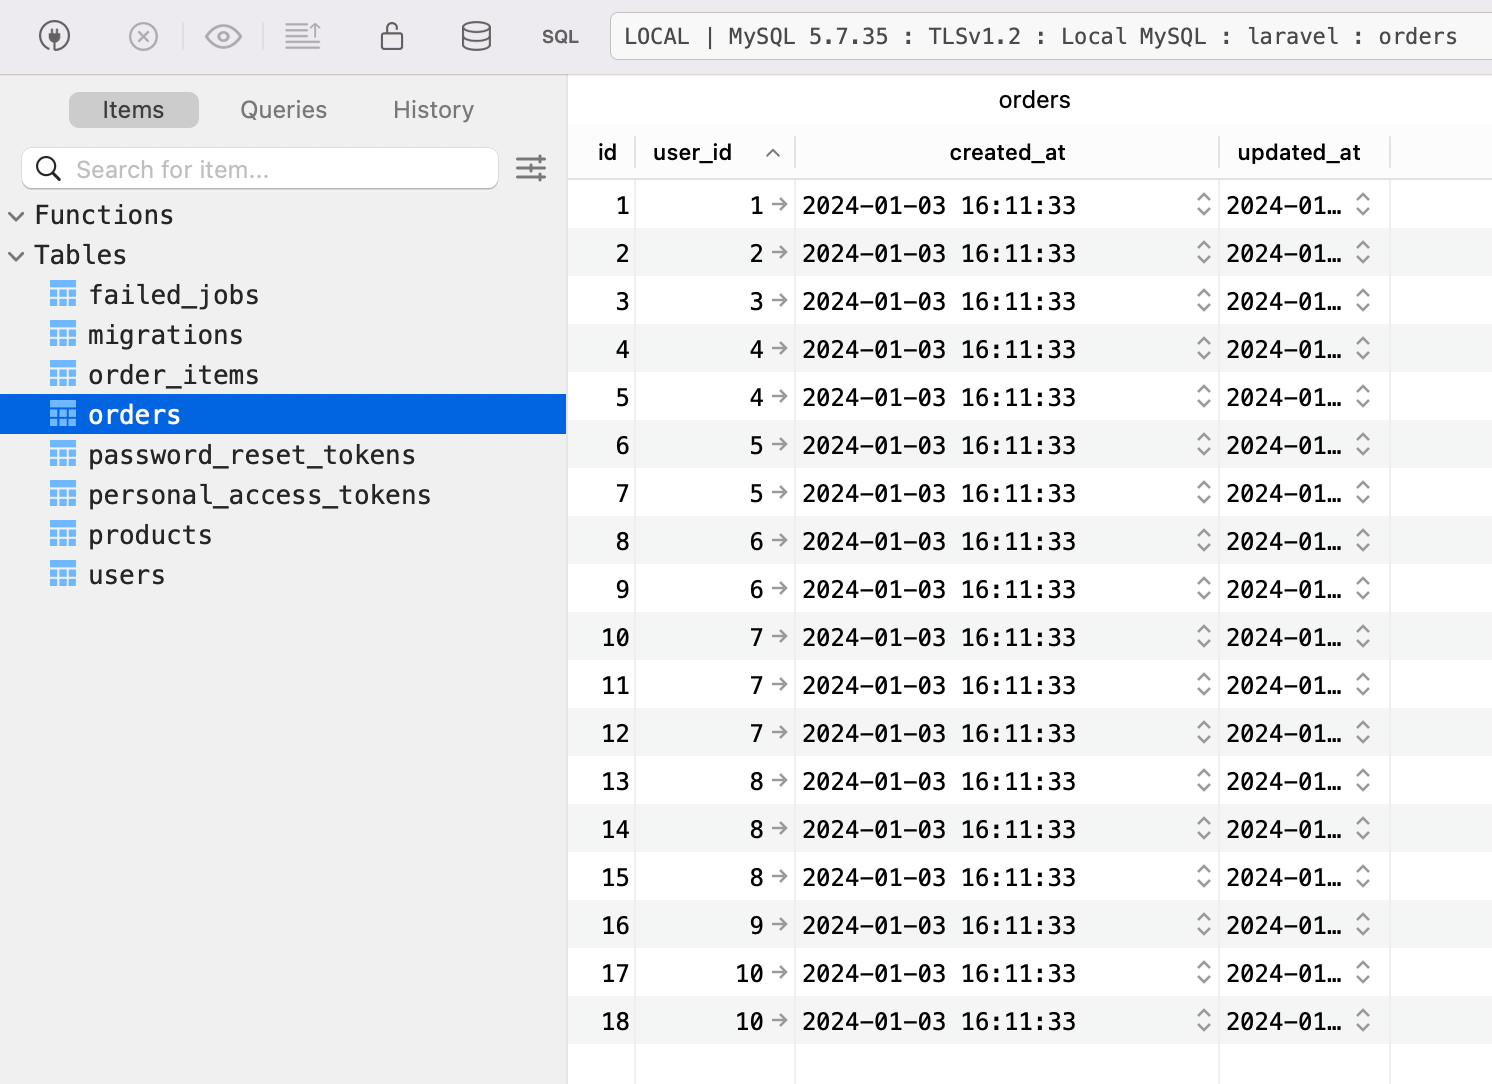
You will see that 10 orders have been created in our orders table with random user_ids have been assigned to it from the users table, some of the users have 2 orders and some have none.
Users 4,5 and 10 has multiple orders where as users 2,9 got no orders at all !
Although, this is sufficient for some of our cases, it doesn’t for work for most. Let’s take a controlled approach to the way we are creating and associating orders with users.
Update the database/seeders/DatabaseSeeder.php class’s run() method with this:
$users = User::factory(10)->create();
$users->each(function ($user) {
	Order::factory()->state(fn (array $attributes) => [
		'user_id' => $user->id
	])->create();
});
- First, we create 10 users using the User::factory() and assign it to
$users - Then we loop over each of these user in
$usersand create an order for them by calling theOrder::factory() - We then use the state method to override the
user_idattribute’s default value (random user we assigned previously in OrderFactory.php ‘s definition method) with new$user->idvalue we provide to it.
If we execute the php artisan migrate:fresh && php artisan db:seed command again, we will now have 10 users in the users table which got created and we have 1 order per each user in our orders table.
Now that we are familiar with how Laravel's model factories and seeders work together, let's refactor our code to take full advantage of Eloquent’s and Model Factories’ to seed more realistic data. And let us also make the code better and beautiful in a Laravel kind of way!
Replace the existing OrderFactory’s definiton() method with the following:
public function definition(): array
{
	return [
		'user_id' => User::factory(),
	];
}
Next, update the DatabaseSeeder’s run() method with:
Product::factory(10)->create();
$users = User::factory(10)->create();
$users->each(function ($user) {
	$orders = Order::factory()->count(rand(1, 3))->make()
	$user->orders()->saveMany($orders);
});
In the code above, inside the closure of $users->each()the method, we call the saveMany() eloquent method to associate multiple orders for each user. The ->count(rand(1, 3)) method tells the OrderFactory to generate a random number of orders between 1 and 3 for each user and this is a more realistic than our previous single order per user approach.
Next, run php artisan migrate:fresh && php artisan db:seed
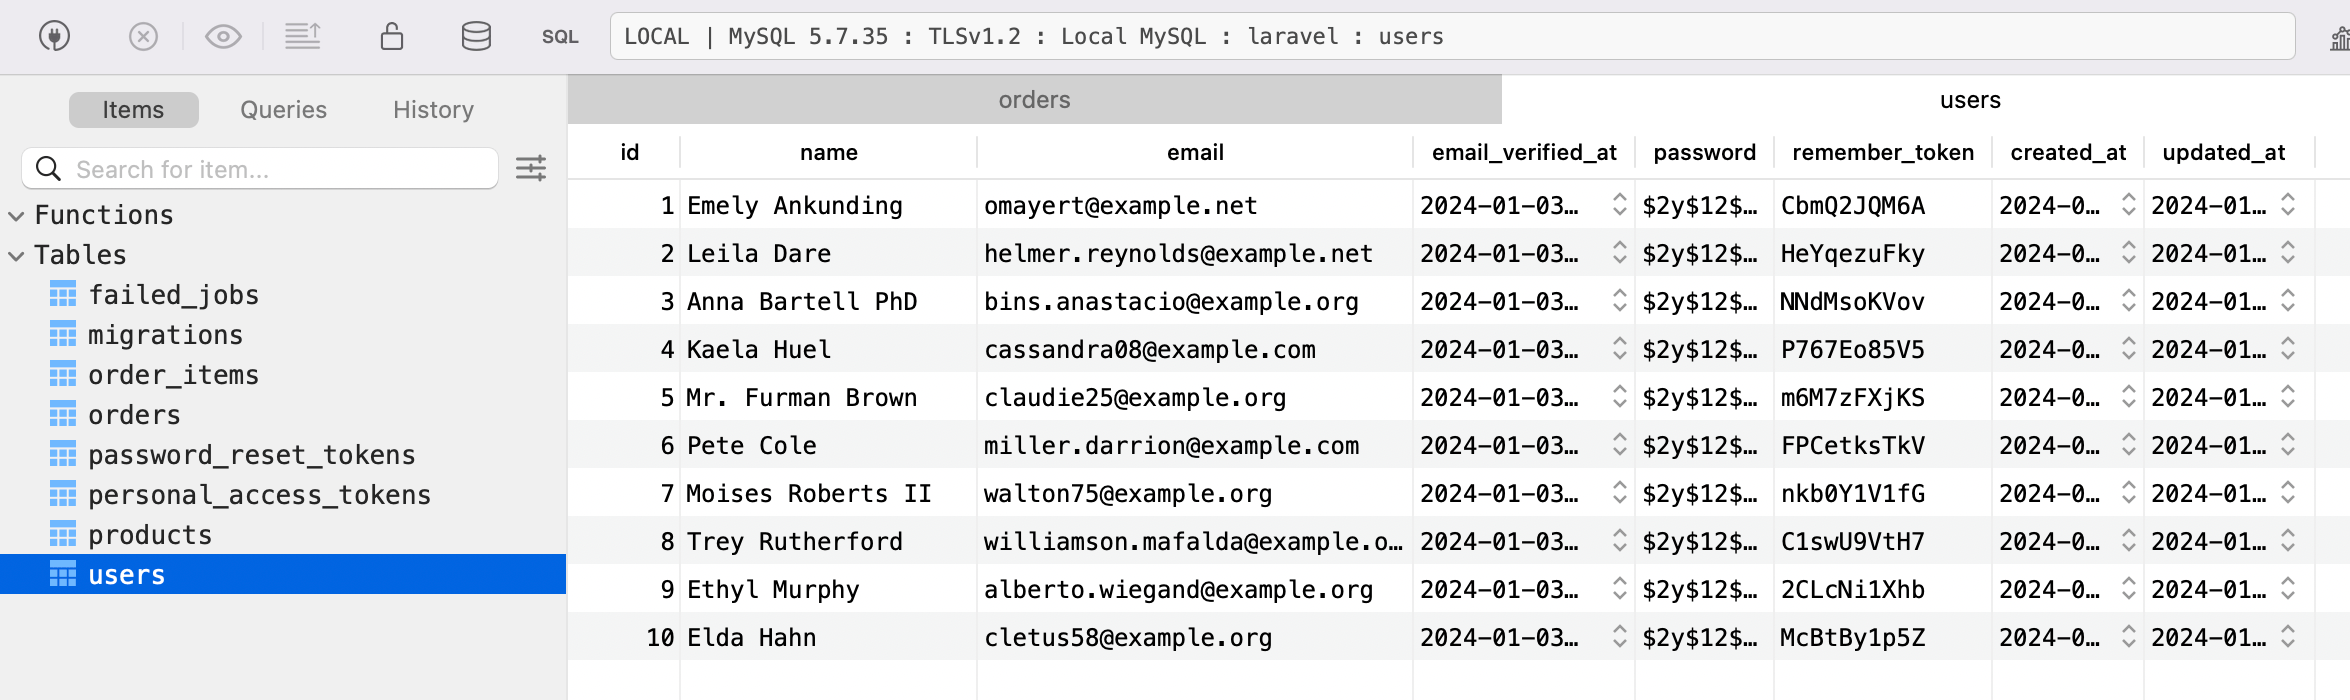
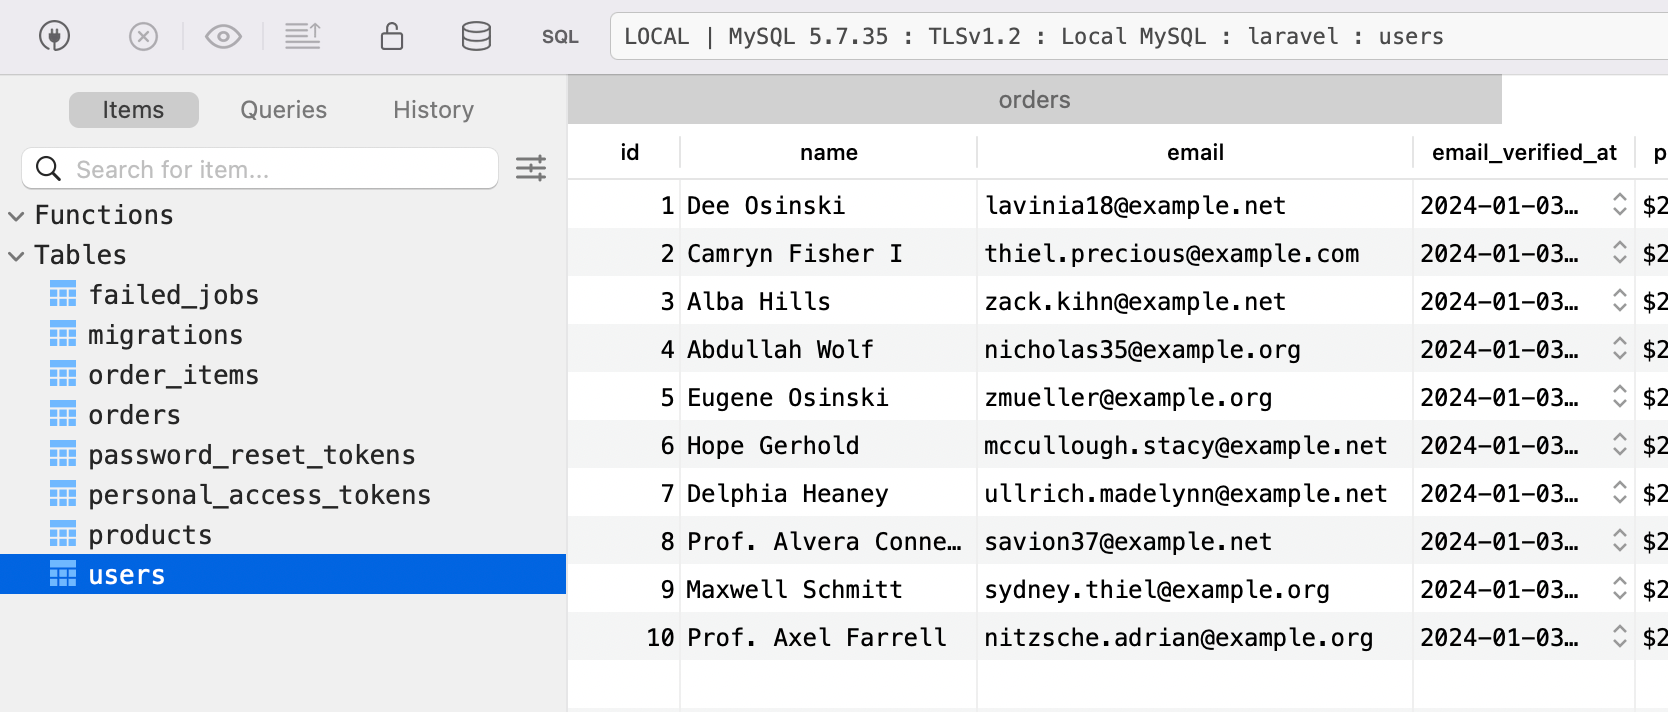
Once it is done, let’s check the users table first:
Wait a minute! Our table contains more than 10 users, how did that happen? 🤔 You see in the OrderFactory method, we’ve added 'user_id' => User::factory(), which is causing an entirely new user to be created each time. To solve this, we can use Laravel Factories' recycle() method to tell Laravel to reuse existing users.
Here is the updated DatabaseSeeder’s run() method with the use of recycle():
Product::factory(10)->create();
$users = User::factory(10)->create();
$users->each(function ($user) {
    $orders = Order::factory()->recycle($user)->count(rand(1, 3))->make()
    $user->orders()->saveMany($orders);
});
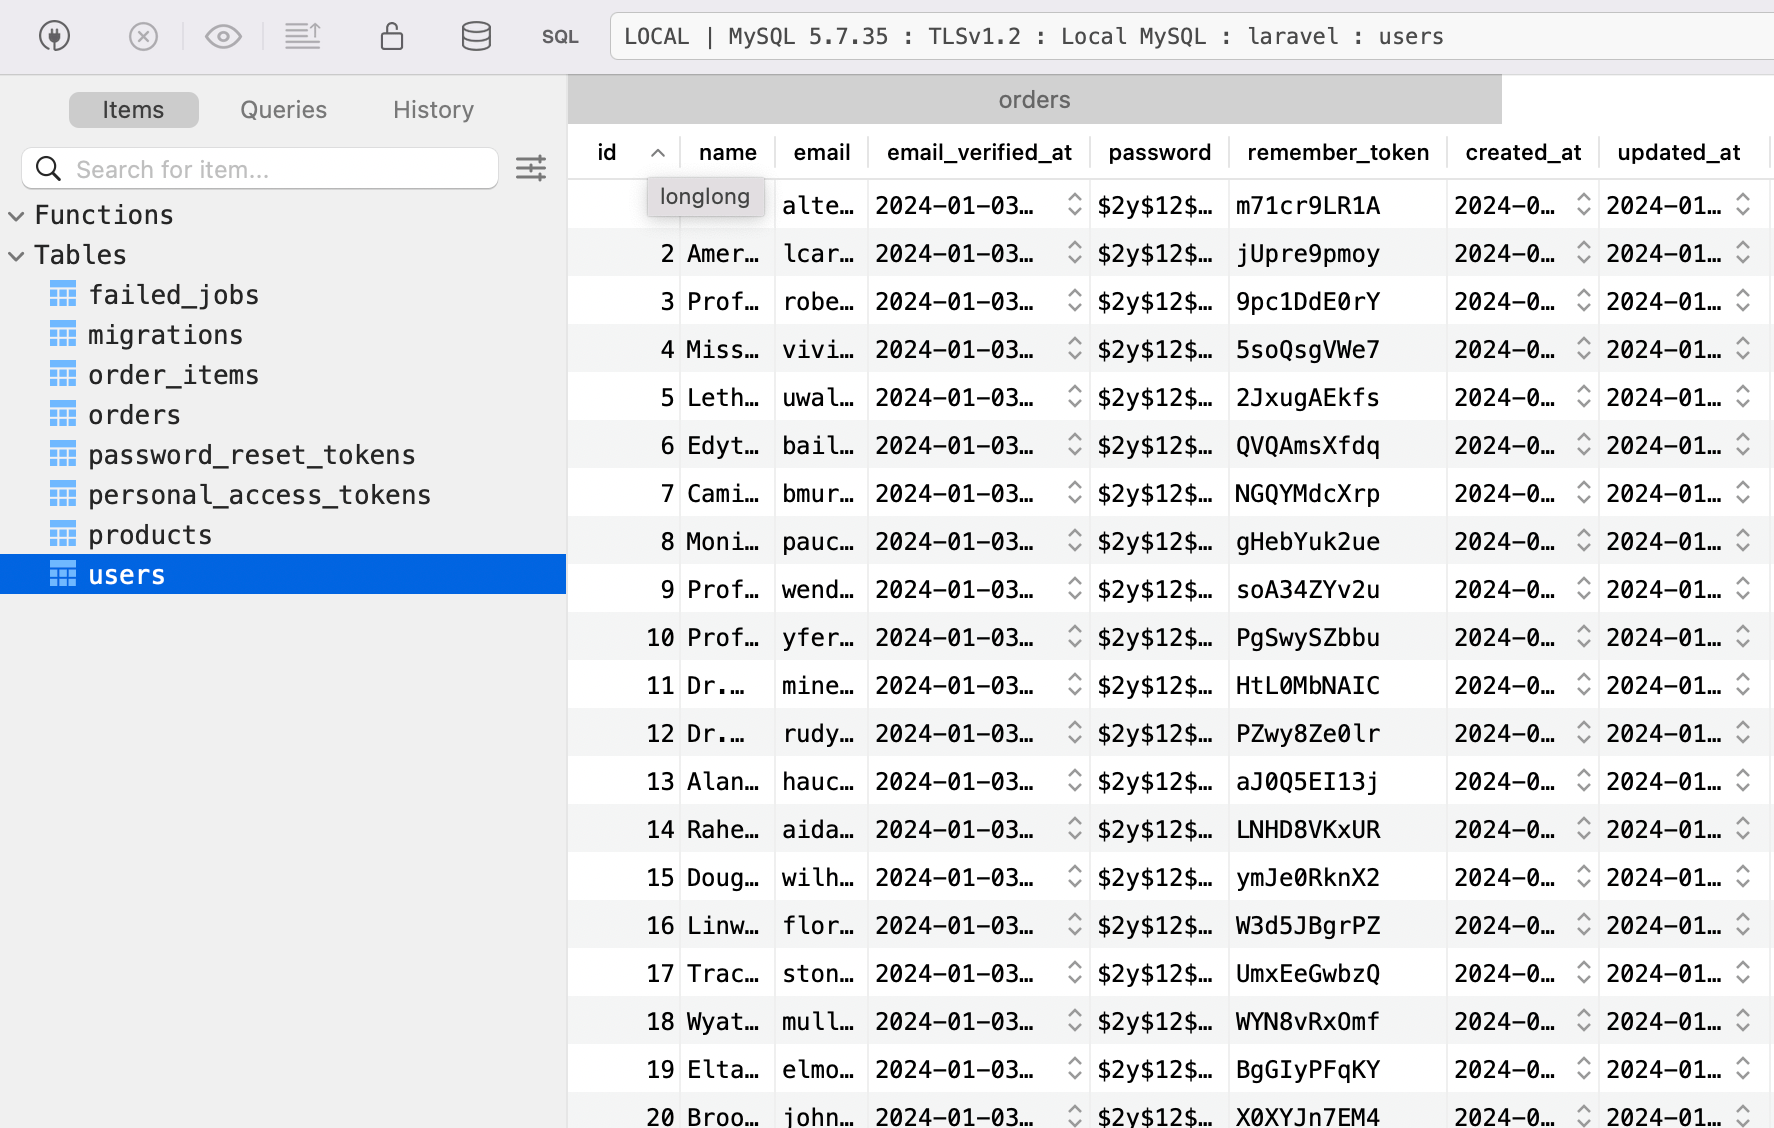
The recycle($user) method tells Laravel to reuse the existing User model instance instead of creating new ones. Now, if we run php artisan migrate:fresh && php artisan db:seed, we’ll see only 10 users in the users table, with each user having a random number of orders between 1 and 3.
Here's the users table
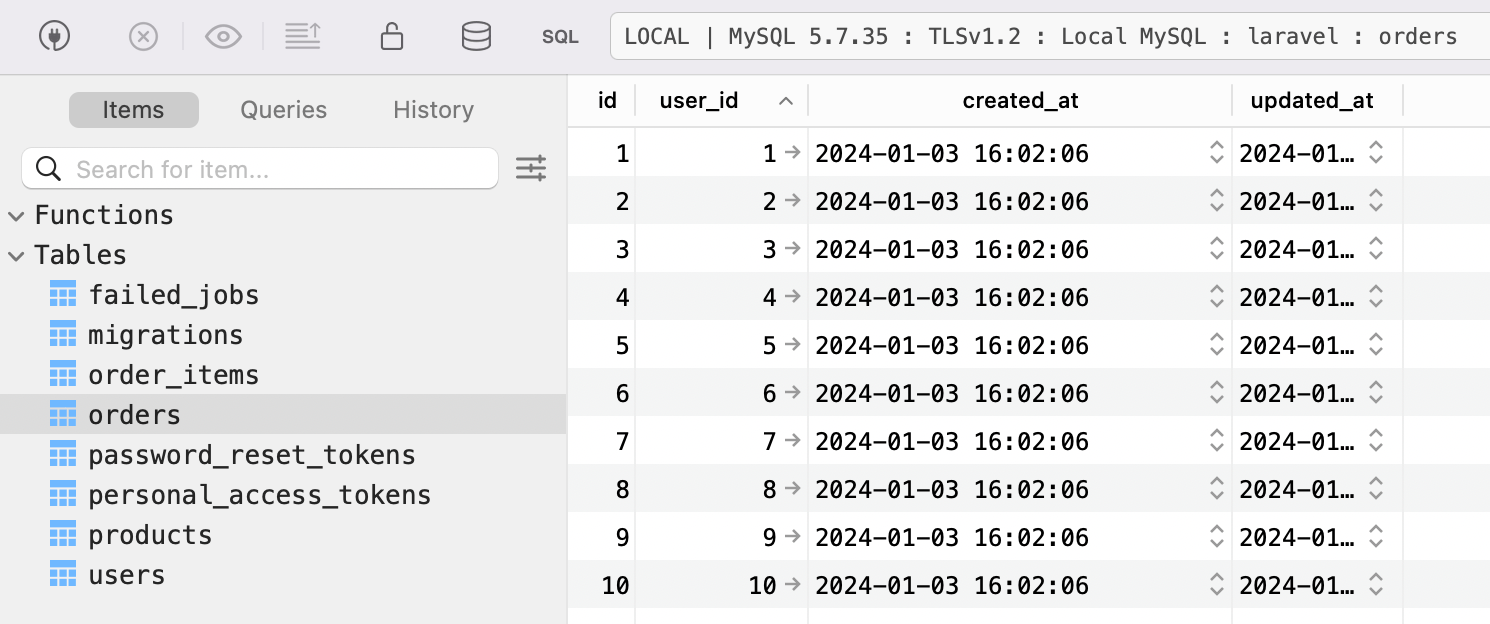
And here's the orders table
Perfect! Now the only remaining thing is to link the products and and orders through the order_items table. Let's do that. Inside the OrderItemFactory, replace the definition() method with the following code:
public function definition(): array
{
    $product = Product::inRandomOrder()->first();
    return [
        'order_id' => Order::factory(),
        'product_id' =>  $product->id,
        'price' => $product->price,
    ];
 }
What’s happening here:
-
$product = Product::inRandomOrder()->first();retrieves a random product from the products table. -
'order_id' => Order::factory()creates and assigns an Order using the OrderFactory, similar to what we did earlier. We will pass this Order through therecycle($order)method inside our OrderSeeder.
Next, let’s open up the DatabaseSeeder class again and update the run() method with the following code:
public function run(): void
{
	Product::factory(10)->create();
	$users = User::factory(10)->create();

	$users->each(function ($user) {
	    $orders = Order::factory()->recycle($user)->count(rand(1, 3))->make();
	    $user->orders()->saveMany($orders)->each(function ($order) {
	        $orderItems = OrderItem::factory()->recycle($order)->count(rand(1, 10))->make();
	        $order->items()->saveMany($orderItems);
	    });
	});
}
Okay, by this point, You may have understood what's happening, or you may still have questions. Either way, here's the breakdown of the final code:
- We loop through the saved orders using
each(function($order) {closure to perform the order items creation.
$user->orders()->saveMany($orders)->each(function ($order) {
- Similar to what we did previously for orders, we create a random number of order items using the
->count(rand(1, 10)method. And for each of these orders we also ensure no new orders are created by using therecycle($order)method, Finally, we save the created order items to each order usingsaveMany($orderItems)
 $orderItems = OrderItem::factory()->recycle($order)->count(rand(1, 10))->make();
 $order->items()->saveMany($orderItems);
And once we run the final DatabaseSeeder again with php artisan migrate:fresh && php artisan db:seed we will have 10 users in the users table, each with 1 to 3 associated orders and each order will have 1 to 10 associated order items.
Pretty neat, huh ? 😀
We can refactor the code and make it even cooler by using some new cool Laravel Model factory methods. I'll show you how to do that and show you few more techniques which we can use to seed complex data and relationships in the next part of this artcle. Stay tuned!